Saturday, November 26, 2011

a Rock Band or Guitar Hero instrument hanger

I've found myself with a number of video game instruments, some of them just for parts, so I thought I'd get them out of the way and display them in the basement.

That is a 2x4 with 4" screws spaced 2" apart. It's 11" from the left screw of one guitar to the left screw of the next guitar.

The strap closest to the camera is how I've hung my Rock Band keyboard (keytar).

Thursday, November 24, 2011

metal Makerbot spool holder

A common issue with the Makerbot 3D printer is setting up something to hold the spool of plastic as it is being fed into the machine. I decided to cut a spool stand out of metal using a CNC plasma cutter that I have access to.

The spool is about 8 inches across, with a 2 inch hole in the middle (I know, metric measurements are preferable, but the plasma cutter workflow is easier in inches). I wanted something quick and easy that would hold the spool vertically, so I came up with this:


I drew it in Inkscape for cutting out of flat sheet of 1/8th inch steel, exported the drawing using Better DXF Output for 
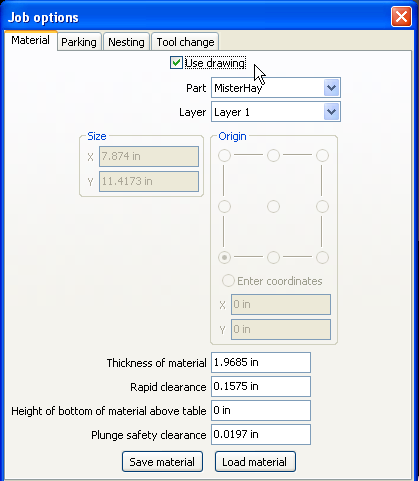
SheetCam to turn it  into g-code for the CNC plasma cutter. I'm currently looking into PyCAM, heekscnc, and PartKAM as free alternatives to SheetCam, but that's another post.

After cutting it out, I bent it on a brake to an angle of about 135 degrees (about 3π/4 radians) and cleaned up the edges using a bench grinder. In hindsight it would have been easier to do those steps in the opposite order, but I guess that's part of the learning process.


And here's the (mostly) finished product. I still need to add a piece of plastic or slippery tape where the spool rests on the metal in order to allow it to spin more freely.

If I build another version of this, I'll round the corners a little more and cut some sort of design into the base.

Plasma Cutting with Inkscape, SheetCam, and Mach3


1. Start up Inkscape and under the File menu choose Document Properties. Change the default units and the document size units to Inches (in). Then close that window.

2. Make your drawing, the colors don't matter.

3. Select everything you've drawn and under the Path menu choose Object to Path.


4. Save your drawing as a Better DXF Output file.

5. Start up SheetCam. It should already be set up for plasma cutting, but check this by clicking on the Options menu and choosing Machine. The Machine type should be Jet Cutting and the Post Processor should be Mach 3 plasma pauses. Click OK.


6. Under the File menu choose Import drawing. Find your drawing (you may need to change the Files of type to DXF files). You can leave the default scaling as 1 (metric) on the next screen that comes up.


7. Under the Options menu select Job options and click the checkbox for Use drawing.

8. You should now have a preview of what your work will look like once it has been cut.

9. If for some reason you don't have any tools defined on the left side of the screen, under the Tools menu select New jet cutting tool and set the options as you see in the image below.

10. We're now set to create a new cutting operation. Under the Operation menu select Plasma cut. Decide whether you want an Inside Offset where the tool cuts on the insides of your lines, or an Outside Offset where it does the opposite.
Inside Offset
Outside Offset

11. I'd recommend a 0.2 inch lead in and lead out, as shown in the image below. Check with your teacher on what the feed rate should be for the material you're cutting and the torch setting.

12. Click the P button at the top left to run the post processor which outputs the Gcode for Mach 3. Save it as a .tap file. Put that .tap file on a USB drive if you're not sitting at the plasma controller computer.


13. On the plasma controller computer, start up Mach 3. Under the File menu, choose Load G-Code and find the .tap file that you had just created.

14. Line up the machine as demonstrated by your teacher, make sure everything is ready and safe, and start the cycle. You'll have to start it again each time it pauses. Remember to follow all of the proper safety procedures.

Friday, November 11, 2011

100 posts

Not specifically technology related, but an interesting convergence of numbers that I'm making my 100th post on this blog on the date 11/11/11.

Fun stuff.

Thursday, November 10, 2011

ideas for sending multiple text messages

A quick summary of a conversation I had today about sending text messages to multiple recipients.

Remind101.com is set up more for individual teachers, but it may do what you need.

Twilio is a platform for building sms and phone call apps/applications.

If you know which wireless provider each of them subscribes to, you can use email to sms, and even set up a Google Spreadsheet to do that.

Or you could build an Android App (using the App Inventor if you need) that sends multiple messages from your smartphone.

Just a few of my thoughts, hopefully that helps.

Edit: I was reminded that Edmodo allows students and parents to subscribe via email or SMS.